You have spent three evenings building a half-elf ranger. You know her backstory, her fear of deep water, the scar on her left cheek. Then the session starts, someone asks "what does she look like?", and you wave your hands and say "kind of tall, kind of rugged." That moment is exactly why an AI art generator for DnD has become a standard tool at the table. Type a few lines, get a face, and suddenly your character exists in the room.
This article shows how to build DnD character portraits that look like real photographs of real people in costume, how to write prompts that actually work, and which free options are worth your time. Every prompt below is copy-ready.
Why DnD Players Use AI Art
A Face for Every Character
Commissioning an artist is wonderful, but it costs money and takes weeks. A campaign might have one player character, four villains, a tavern owner, and a dragon cult leader all showing up in a single month. An AI portrait generator gives you a face for each of them in minutes.
Players use portraits in a few common ways:
- Character sheet header, so the sheet feels like yours.
- VTT tokens, cropped to a circle for online play.
- NPC handouts, printed and slid across the table at the right dramatic moment.
- Campaign wikis and Discord channels, where a face makes a name memorable.
- Social media posts, because people love showing off their heroes.
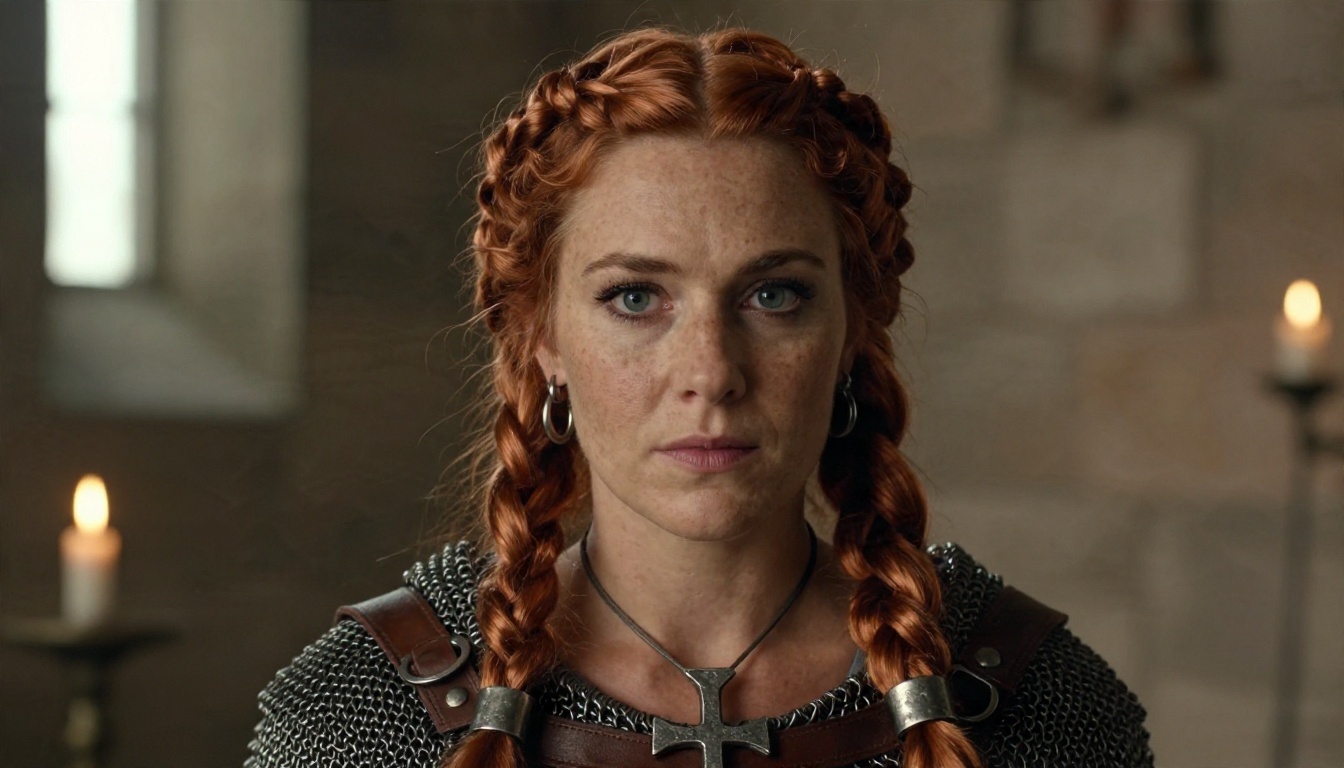
What Players Actually Want
Most people searching for a DnD AI art generator want three things: speed, control, and a result that feels believable. They do not want a vague fantasy blur. They want this dwarf, with this braid, holding this holy symbol.
💡 Quick truth: The better your character notes, the better your portrait. A generator is an interpreter, not a mind reader. Give it specifics.
What Makes a Good DnD Portrait
Photoreal or Painted Look
Fantasy art traditionally means oil paintings and book illustrations. Photorealism is a different and surprisingly powerful choice. A portrait that looks like a film still of an actor in costume makes the character feel present. It sells the idea that your tiefling sorcerer could walk into a real room.
The portraits in this article all follow a photographic approach: natural light, real skin texture, believable fabric, and a shallow depth of field. If you prefer a painted look, the same prompt structure still works. You just swap the photographic terms for a medium.
Race, Class, and Gear Details
A portrait reads as a class long before anyone reads the sheet. Think about the silhouette.
| Class | Visual Signal | Props That Help |
|---|
| Cleric | Holy symbol, calm posture | Chainmail, candles, scripture |
| Rogue | Hood, crouched or leaning pose | Daggers, lockpicks, dark leather |
| Barbarian | Broad shoulders, fur, scars | Axe, war paint, bone trinkets |
| Wizard | Robes, books, dim warm light | Spellbook, staff, spectacles |
| Paladin | Polished armor, upright stance | Tabard, shield, sword hilt |
| Sorcerer | Unusual features, rich fabric | Horns, rings, velvet coat |
Race matters too, but treat it as one detail among many. Pointed ears, tusks, horns, and beards are easy for a model to draw. Subtle things like "a dwarf's broad nose and heavy brow" need to be spelled out.
Six Parts of a Strong Prompt
After a lot of experimenting, the prompts that give the best fantasy character portraits share the same bones. Build yours in this order:
- Subject: age, build, race, class, expression.
- Costume and gear: materials, colors, wear and tear.
- Setting: where is this person standing or sitting?
- Lighting: direction, time of day, warmth.
- Camera: lens, distance, angle.
- Texture and mood: skin detail, fabric, film grain.
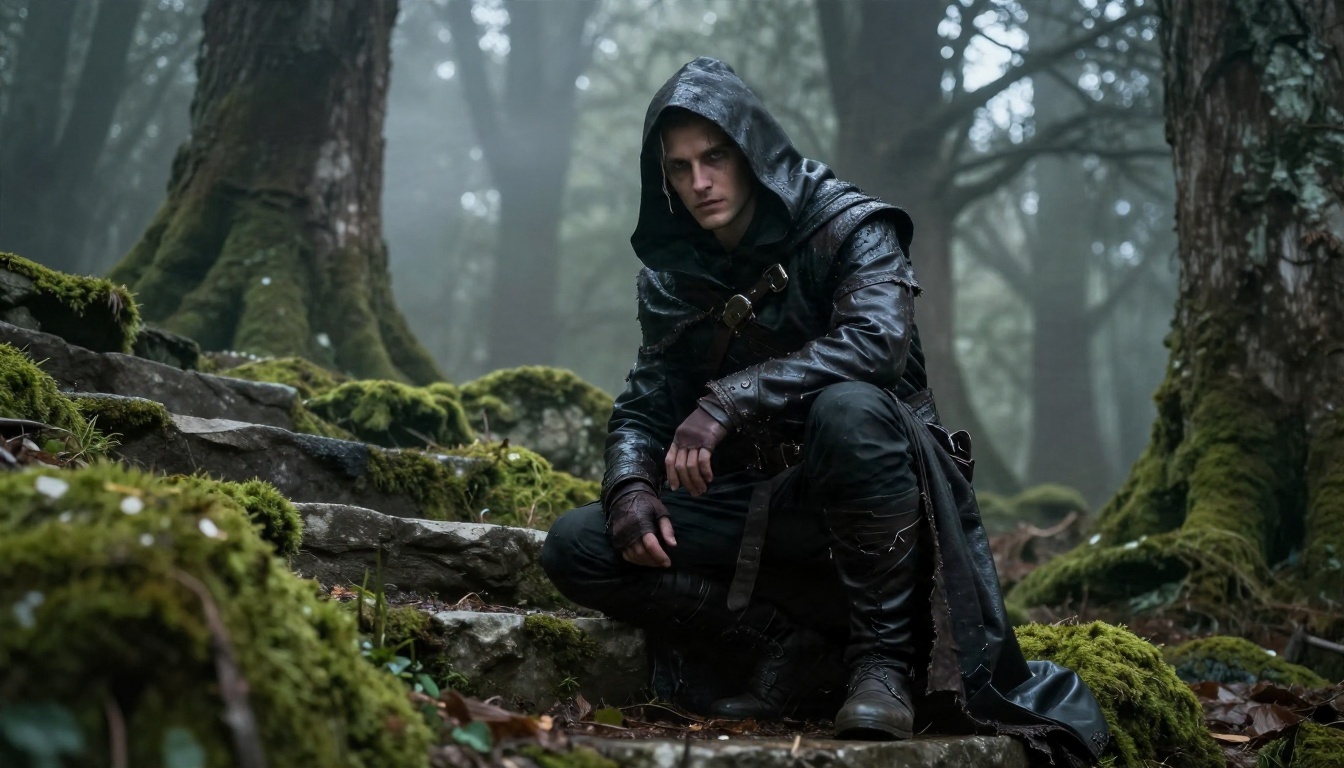
Here is the formula applied to the rogue above:
"Low-angle shot of a tall elven rogue in a dark hooded leather cloak, crouched on a moss-covered stone staircase in an ancient forest ruin, sharp cheekbones, pale grey eyes looking at camera, damp morning mist between mossy trees, cool diffused overcast light from above, 50mm f/2 lens, wet leather and frayed fabric textures, subtle film grain, Kodak Portra 400."
Notice what is not there: no list of random adjectives like "epic, stunning, ultra detailed masterpiece." Concrete nouns beat hype words every time.
Copy-Ready Prompts by Class
Use these as starting points. Change the hair, the setting, the age, the gear.
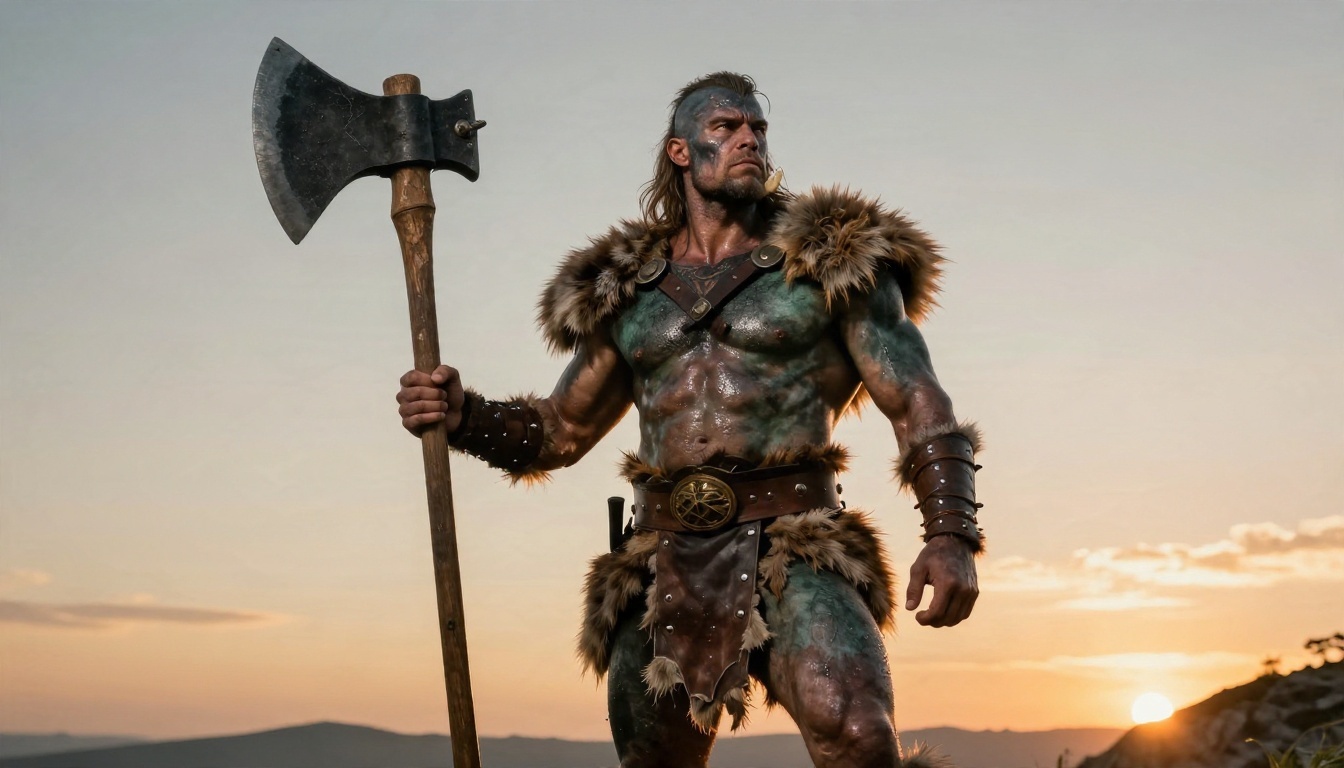
Barbarian
"Medium shot of a muscular half-orc barbarian with gray-green skin and small tusks, fur mantle on the shoulders, holding a large wooden axe, standing on a windswept highland ridge at golden hour, backlit warm sunset rim light, 70mm f/2.8 lens, rough fur and scarred leather armor, Kodak Portra 400 film grain."
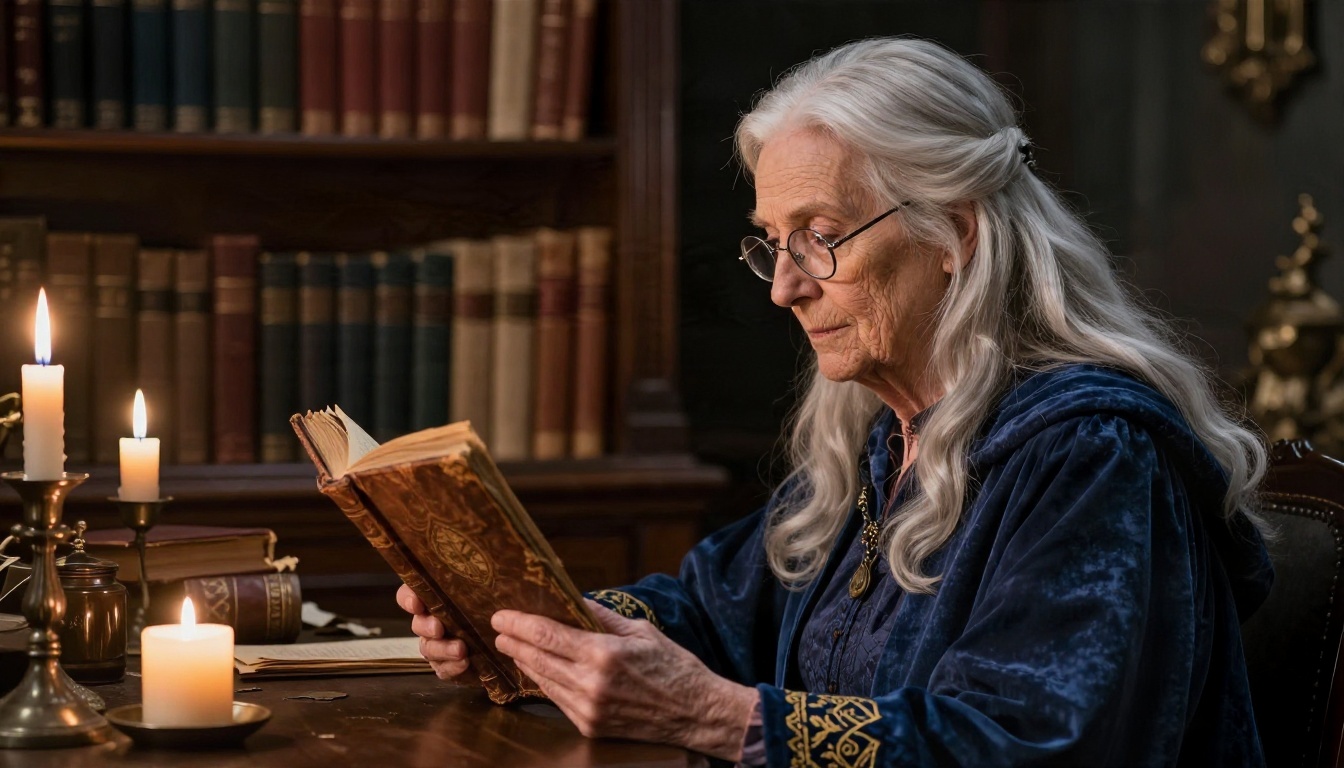
Wizard
"Candid side-profile of an elderly wizard woman with long silver hair, deep indigo robe with embroidered hems, spectacles on her nose, reading an old leather spellbook at a cluttered candlelit desk, warm candlelight from the front left, dark bookshelves behind, 85mm f/1.4 lens, velvet and parchment textures."
Paladin
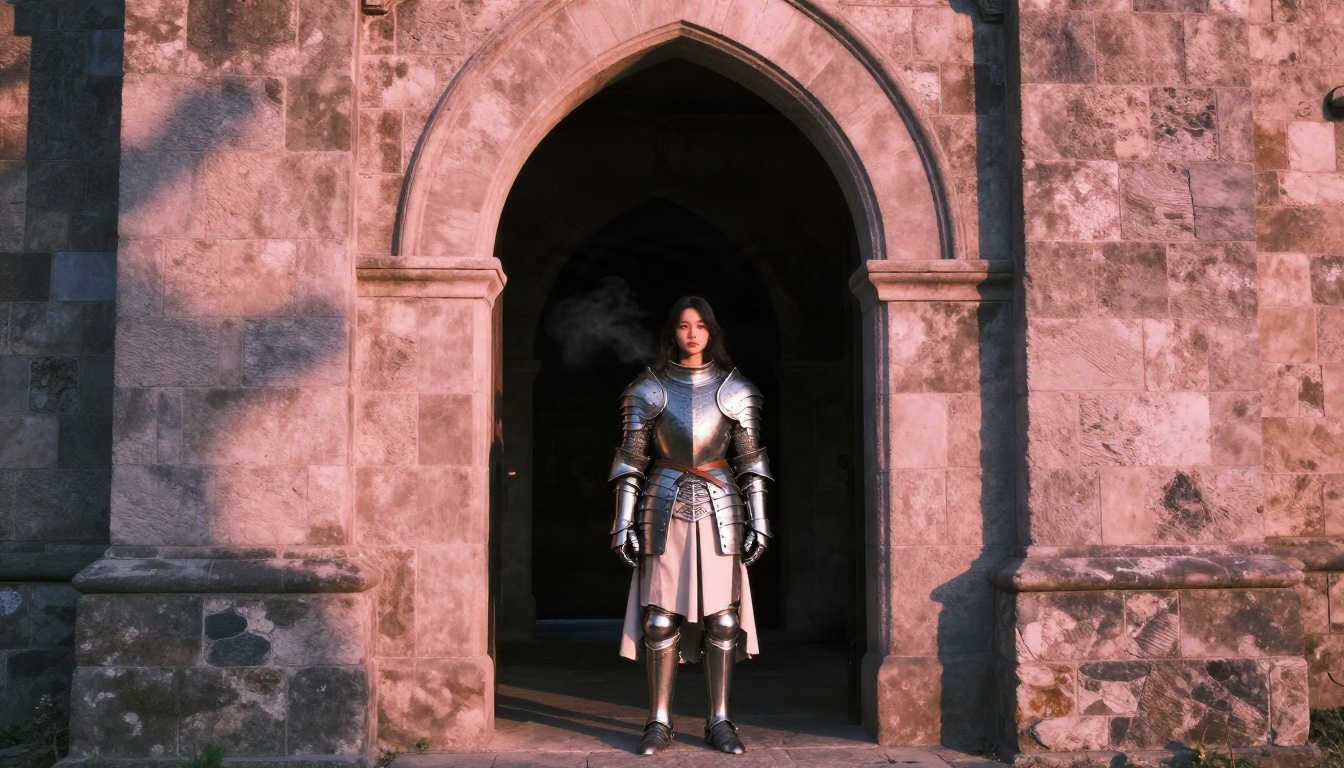
"Full-length shot of a young human paladin in polished steel plate armor with a white tabard, standing at the arched entrance of a medieval stone courtyard at dawn, pink-gold light from the left, 35mm f/2.8 lens, slightly low angle, scratches on metal, breath visible in cold air."
Tiefling Sorcerer
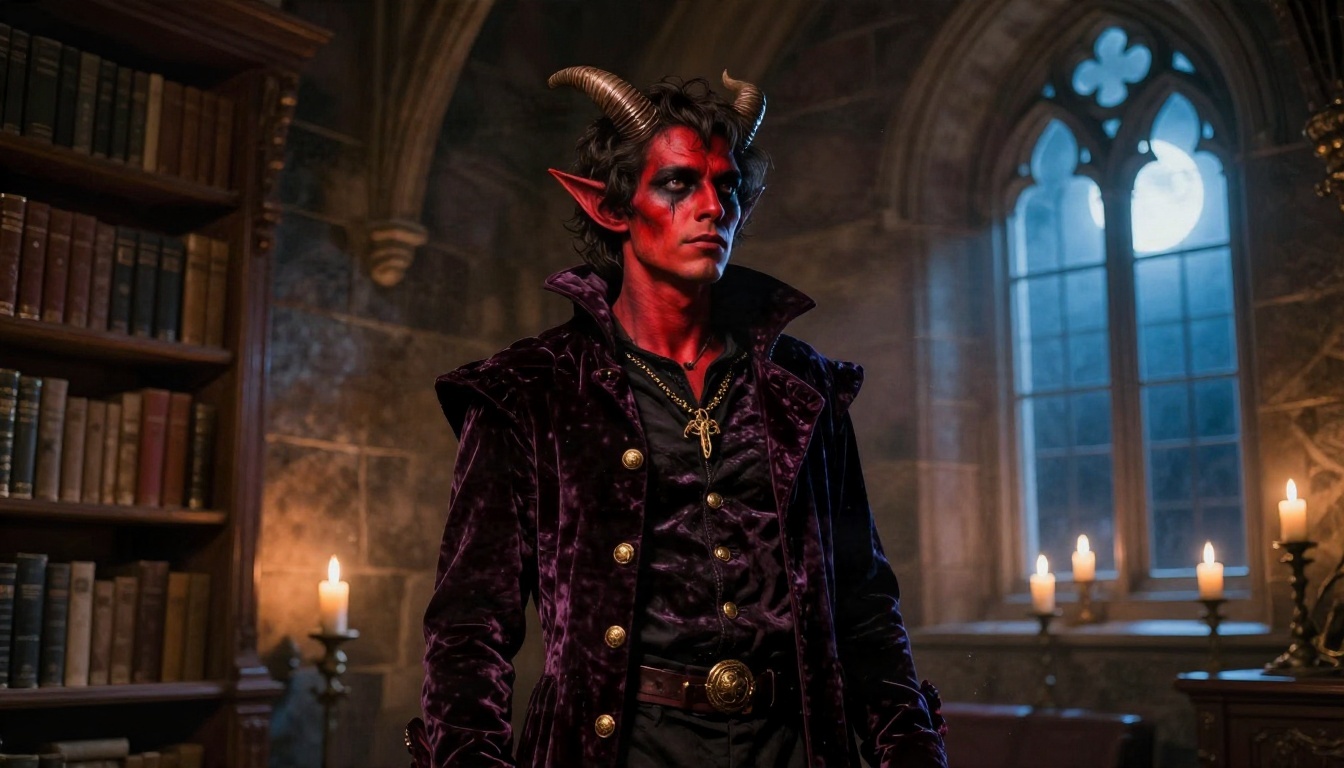
"Wide three-quarter shot of a young tiefling sorcerer with small curved horns and deep red skin tone, dark velvet coat with gold buttons, standing in a candlelit stone library with tall arched windows, cool moonlight from the right balanced with warm candles, 40mm f/2 lens, dust in the air."
💡 Tip: Keep one prompt file per character. When you need a second image of the same hero, you can copy the subject and costume lines and only change the setting.
Free Options Worth Trying
What Free Really Means
"Free" in the AI image world comes in several flavors. Some tools give you a small daily allowance. Some offer a trial. Some run open models you can host yourself if you own a strong graphics card. Read the plan details before you build a whole campaign around one site, because limits and prices change often.
Here is how to think about it:
- Free trial credits: great for testing a model before you commit.
- Fast, light models: cheaper to run, so more likely to be offered at no cost.
- Heavyweight models: best detail and prompt accuracy, usually with a limit.
- Local models: no cost per image, but you need hardware and patience.
Plenty of well-known names exist outside this platform, such as Midjourney, DALL-E, and Stable Diffusion, and each has its own pricing and rules. What matters most for a DnD table is how the model handles faces, hands, and costume detail.
Models Compared
If you want to try several engines in one place, PicassoIA hosts a large set of text-to-image models. These are the ones that suit portrait work best:
| Model | Best For | Speed Feel |
|---|
| Seedream 4.5 | Sharp, high-resolution portraits with rich detail | Moderate |
| Z Image Turbo | Fast drafts and quick NPC faces | Very fast |
| Flux Schnell | Instant first passes, many variations | Very fast |
| Nano Banana Pro | Detailed 4K output and clean edits | Moderate |
| Imagen 4 | Natural skin and photographic lighting | Moderate |
| Qwen Image 3 | Photorealistic scenes and careful prompt reading | Moderate |
| Ideogram v4 Quality | Portraits that need a bit of clean text, like a banner | Moderate |
A good workflow: draft quickly with Z Image Turbo or Flux Schnell, pick the best composition, then rerun the same prompt in Seedream 4.5 for the final version.
How to Use Seedream 4.5 on PicassoIA
Seedream 4.5 is a strong pick for final portraits because it holds fine detail like chainmail rings, fur, and skin pores. Here is the full process.
Step by Step
- Open the model page. Go to the Seedream 4.5 page on PicassoIA.
- Paste your prompt. Use the six-part formula from above. Start with the subject and costume, then add setting, light, and camera.
- Set the aspect ratio. Use 16:9 for wide scenes and banners. For a character sheet header or a token, a portrait or square ratio is usually a better fit.
- Generate a batch. Make several versions of the same prompt. Faces vary a lot from one run to the next, and the best one is rarely the first.
- Pick the winner. Look at eyes, hands, and the edges of the costume.
- Refine, don't restart. Change one detail at a time, such as the hair color or the light direction, so you can see what each change does.
- Save the prompt. Paste the final wording into your character notes.
Settings Tips
- Be specific about age. "A weathered woman in her fifties" gives a much better face than "an old woman."
- Name the lens. Terms like 85mm f/1.8 push the model toward a flattering portrait look with a soft background.
- Use real light words. "Soft window light from the left" is better than "dramatic lighting."
- Keep the background simple if you plan to crop the image into a round token.
Fixing Common Portrait Problems
Hands, Eyes, and Armor
Even strong models slip sometimes. These are the usual suspects and the fixes that work.
| Problem | Likely Cause | Fix |
|---|
| Extra or fused fingers | Hands in complex poses | Hide hands behind a prop or crop at the chest |
| Mismatched eyes | Side lighting on a close crop | Add "symmetrical eyes, both visible" or switch to soft frontal light |
| Armor that looks like plastic | Missing material words | Say "brushed steel, scratches, worn leather straps" |
| Waxy skin | Too many beauty words | Remove "flawless", add "pores, fine lines, freckles" |
| Random text on clothing | Model fills empty space | Add "no text, no logos" |
If a single detail refuses to cooperate, an image editing model such as Nano Banana can adjust it while keeping the rest of the portrait intact. That is often faster than regenerating from zero.
Keeping a Character Consistent
The hardest part of DnD art is drawing the same person twice. A few habits help a lot:
- Reuse the exact subject line word for word: "freckled dwarf woman in her thirties, braided copper hair with iron rings."
- Pick two or three signature items, such as a scar, a ring, a scarf, and always include them.
- Use a finished portrait as the starting image for an editing model like Nano Banana Pro when you need the same face in a new scene.
- Keep a short "look bible" in your notes with hair, eyes, skin, and clothing colors.
Beyond the Portrait
Upscale and Print
A portrait that looks fine on a phone can look soft on a printed handout. Run it through Real ESRGAN to upscale it up to four times. That gives you crisp edges for a character card, a poster for the table, or a framed print for a player who has been with you for years.
Tokens, Handouts, and Reveals
Here are small touches that make a table fall silent:
- The villain reveal. Print the antagonist's portrait and slide it across the table at the end of a scene.
- Wanted posters. Pair a portrait with a short caption written in your own handwriting.
- Companion cards. Give each player a card for their party's allies and rivals.
- Round tokens. Crop the face tightly and add a thin border for online play.
- Session recaps. Post a new NPC portrait alongside each recap in your group chat.
💡 Table trick: Generate two portraits for important NPCs: one when the players first meet them, and a later one after something dramatic has happened. A bruised eye or a new scar tells the story without a word.
Create Your Next Hero Today
Your character already has a name, a history, and a few strong opinions about elves. All that is missing is a face. Pick a class from the prompts above, swap in your own details, and run it on PicassoIA. Start with a fast model like Z Image Turbo to find the pose you like, then polish it with Seedream 4.5.
Try three versions of your character this week: one heroic, one tired after a long dungeon crawl, and one younger, from before the campaign began. You may find the story deepens each time. Open PicassoIA, paste a prompt, and bring your hero to the table.


