Spending 45 minutes in Photoshop to cut out one product image for a presentation is not a design problem. It's a workflow problem. AI background removal has changed the math on this completely, and most people still don't know it exists.
Whether you're building a pitch deck, a product catalog slide, or a team page, clean cutouts are what separates "looks professional" from "looks like someone tried." This piece breaks down how AI does it, how to do it yourself in under two minutes, and why the results are better than manual selections for most presentation use cases.
Why Clean Cutouts Change How Slides Land
The slide that gets ignored
You've seen it. A product image slapped onto a slide with the original white or grey background still visible, sitting awkwardly on top of the slide's color theme. It looks like a printout taped to a poster board.
Audiences process visuals faster than text. A messy image tells them the presenter didn't care enough to polish the details, and that impression sticks. The cutout isn't just an aesthetic choice. It signals effort, precision, and attention to quality.
What high-performing slides have in common
Investor decks. Brand pitches. Product demos. The ones that get traction share one visual trait: every image that doesn't need a background doesn't have one. People, products, icons, and logos float cleanly on the slide surface, reinforcing the design without competing with it.
The traditional path to achieving this was: open Photoshop, use the pen tool, spend 20 minutes on complex edges, export as PNG, repeat for every image. Now the path is: upload, download PNG, paste into slide. The entire process under 90 seconds.
How AI Background Removal Actually Works
Subject detection without selections
Traditional photo editing requires you to tell the software where the subject ends and the background begins. You draw selections, paint masks, refine edges. AI flips this entirely.
Modern background removal models are trained on millions of images. They've seen every combination of subject type, background complexity, and lighting condition imaginable. When you upload an image, the model doesn't wait for you to select anything. It identifies the subject automatically, segments it from the background, and outputs a clean transparent PNG.
The technical backbone is semantic segmentation. The model assigns each pixel a classification (subject or background) based on what it learned during training. For standard subjects like people, products, animals, and objects against clear backgrounds, accuracy is extremely high.
Precision on hair, fur, and complex edges
The hardest part of manual cutouts has always been complex edges. Hair is the classic example. Individual strands catching light against a busy background used to require either hours of masking work or visible compromise in quality.
AI models handle this because they were trained specifically on these hard cases. They learn the statistical patterns of how hair pixels behave at the edge of a selection. The result isn't perfect in every single case, but for presentation use, where images are typically viewed at slide-scale rather than zoomed in, the quality is more than sufficient.
💡 Tip: For the cleanest AI cutouts, use source images shot against a solid or near-solid background when possible. Even a plain wall dramatically improves edge accuracy on complex subjects like curly hair or fine fabric detail.

The Fastest Workflow for Slide-Ready Cutouts
What you actually need
To get a clean transparent PNG for your presentation, you need exactly two things: the source image and an AI background remover. No software to install. No design skills. No subscription for basic use.
The output is always a PNG file with a transparent background. PNG supports the alpha channel, which is the technical term for "that part of the image that shows nothing." When you place it into a slide, the transparent areas become invisible, and only your subject shows.
| Format | Supports Transparency | Best For |
|---|
| PNG | Yes | Presentations, web, print |
| JPG | No | Photos only, no cutouts |
| WebP | Yes | Web use |
| SVG | Yes | Icons and logos |
For presentations, always export your cutout as PNG. JPG compression destroys transparent edges entirely.
Batch processing when you have multiple images
Running ten product images through a background remover one at a time is still faster than Photoshop, but it's not the fastest option. Many AI tools, including the Remove Background model on PicassoIA, support batch workflows where you can process multiple images in a single session.
For product presentations, this matters. If you're building a catalog deck with 20 SKUs, processing them individually adds up. Setting aside 10 minutes to batch the entire set and then placing all the cutouts at once is a more efficient sequence.
How to Use Bria Remove Background on PicassoIA
PicassoIA hosts the Bria Remove Background model, one of the most accurate AI background removal tools available online. Bria is known for precise subject isolation on product and portrait photography, making it particularly well-suited for presentation assets.
Step 1: Open the tool and upload your image
Go to the Bria Remove Background page on PicassoIA. Click the upload area or drag your image file directly onto it. JPEG, PNG, and WebP files all work. There's no minimum resolution required, but higher resolution source images produce cleaner edges on the output.
Step 2: Let the AI process the image
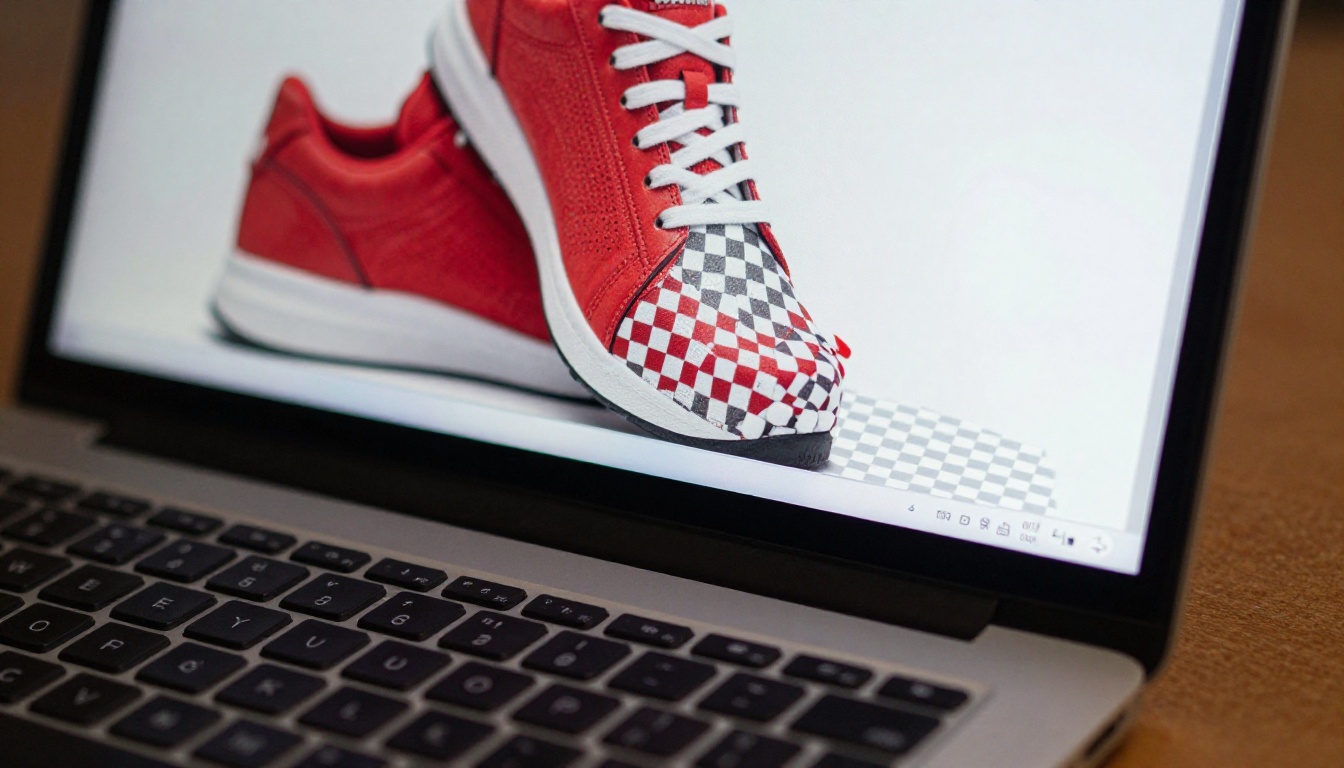
The model runs automatically once the image is uploaded. Processing typically takes a few seconds depending on image size and complexity. You'll see the original alongside the processed result with the background removed. The transparent areas are shown as a grey and white checkerboard pattern, which is the universal indicator for "no background here."
Zoom into the edge areas to check quality on complex zones like hair, fine fabric texture, or product edges before downloading.

Step 3: Download the transparent PNG
Click the download button to get your PNG file with the transparent background. The file name typically matches the original with a suffix indicating it's been processed. Save it somewhere you'll find quickly when building your slides.
Step 4: Place the cutout into your presentation
In PowerPoint: Insert > Pictures > This Device. Select your PNG. The transparent background drops away immediately. Resize and position as needed.
In Google Slides: Insert > Image > Upload from computer. Same result. The transparency is preserved automatically.
💡 Tip: If your cutout has a slight white fringe visible on a dark slide background, this is usually caused by anti-aliasing on the original JPEG. Processing a higher-quality source image, or using the PNG version of the original, usually fixes this.

What Makes a Cutout Look Good on a Slide
Lighting direction matters after removal
This is the detail that separates a cutout that looks natural on a slide from one that looks pasted on. When you isolate a subject from its original background, it keeps its original lighting. If you then place it on a slide with a light source coming from the opposite direction, the subject looks visually wrong even if the edge quality is perfect.
When possible, choose source images with lighting that matches the slide's general visual direction. A product lit from the upper left placed on a light-gradient slide that brightens from the upper left will look like it belongs there.
Scale relative to slide elements
A cutout product image that's 60% of the slide height dominates the layout. One that's 15% feels like an afterthought. Neither is universally right. The principle is that the cutout's scale should match its importance in the visual hierarchy of that specific slide.
Comparison slides benefit from two equal-sized cutouts placed symmetrically. Feature highlight slides often work best with one large cutout on one side and text on the other. Team slides work well with portrait cutouts at consistent head-crop sizing so everyone looks uniformly presented.
Using shadow to restore depth
Once the background is gone, the subject can look flat on the slide. A subtle drop shadow re-establishes the depth relationship.
In PowerPoint: right-click the image > Format Picture > Shadow > Outer. Use a small blur radius (4 to 6px), low transparency (70 to 80%), and minimal distance (2 to 4px). In Google Slides: Format options > Drop shadow. The same conservative settings apply.
A shadow that's too strong looks cheap. Barely-there is the target.

Common Cutout Mistakes in Presentations
Using low-resolution source images
A 400x400 pixel product photo that was fine as a thumbnail on a website will look terrible as a cutout on a 1920x1080 slide. The AI can only work with what's in the original file. Upscaling after the fact compounds the problem.
Source images for presentations should be at minimum 1200px on their longest edge. For full-bleed use cases, 2000px or more gives you working room for resizing without quality loss.
💡 Tip: If you only have a small source image, run it through a super-resolution AI tool first to upscale it cleanly before removing the background. PicassoIA offers super resolution models that can upscale 2x to 4x, giving the Bria Remove Background model cleaner source material to work with.
Ignoring background complexity at source
The harder the original background, the harder the cutout job. A product shot against a white seamless background takes seconds and looks perfect. The same product shot in a warehouse with pipes, other products, and mixed lighting in the background takes more work and produces edges that need refinement.
If you're shooting images specifically for use in presentations, a clean background at source is always worth the extra effort. One roll of white craft paper from an art supply store solves the problem permanently.
Overcomplicating the placement
A clean cutout on a white slide is genuinely effective. You don't need to add textures, gradients, or effects to justify the cutout. Often the cleanest slides are the ones where the product or subject sits on a very simple background, and the edge quality does all the work. Restraint in slide design is a skill.

When AI Cutouts Work Best
Product photography for e-commerce pitches
Product images are the strongest use case for AI background removal. Products typically have defined, non-organic edges that AI models handle very accurately. The output from the Bria Remove Background model on a standard product shot against a neutral background is often indistinguishable from a professionally masked image.
For pitch decks aimed at retail buyers, investors, or brand partners, having clean product cutouts on every relevant slide immediately signals professional presentation standards.
Portrait photos for team slides
Team slides with headshots still cut from the original background (complete with whatever office, wall, or background the person was in front of) look inconsistent. AI background removal fixes this without requiring everyone to reshoot against a consistent backdrop.
Remove the background from each headshot, use a consistent circular crop at a consistent size, and place all portraits on a matching background color within the slide. The team page goes from "a mix of different photos from different settings" to "polished, unified team."
Infographic elements and icons
Beyond photos, AI cutout tools work well on infographic elements where the original was saved in a format that doesn't support transparency. Running a diagram or icon through a background remover and getting a clean PNG is often faster than sourcing a transparent version of the original file.

PowerPoint vs. Google Slides: Transparency Handling
Both platforms handle transparent PNGs correctly, but they differ in how they render edge anti-aliasing against colored backgrounds.
| Feature | PowerPoint | Google Slides |
|---|
| PNG transparency | Full support | Full support |
| Edge anti-aliasing | Excellent | Good |
| Drop shadow built-in | Yes | Yes |
| Background color blending | Automatic | Automatic |
| SVG support | Full | Partial |
PowerPoint handles complex cutout edges slightly better at high-resolution export settings because of how it renders anti-aliased pixels against slide backgrounds. For presentations that will be shown at 1080p or exported as high-quality PDFs, PowerPoint gives marginally better results on complex edges.
Google Slides is perfectly adequate for most use cases and has the advantage of real-time collaboration. For team presentations where multiple people are working on the same deck, Slides is more practical even if the edge rendering is slightly less refined.
💡 Tip: When exporting your final presentation as a PDF, both platforms preserve PNG transparency. Images placed on colored slide backgrounds will render correctly in the exported file.

Start Creating Your Own Cutouts
The gap between a presentation that looks thrown together and one that looks deliberate is often just this: clean images on clean backgrounds. AI background removal has made this achievable for anyone without Photoshop experience, without a designer on call, and without spending an hour on a single image.
Bria Remove Background on PicassoIA is where to start. Upload any product photo, portrait, or object image, and you'll have a transparent PNG in seconds. From there, every slide you build has access to professional-quality cutouts without the time investment that used to come with them.
Try one image. The process takes about 60 seconds. You'll immediately see whether the result works for your presentation, and in most cases, it will. Once you've seen the difference a clean cutout makes on a single slide, it becomes the standard you hold every future slide to.


