Generate imagesVisual EffectsLarge Language Models
5 Camera Angle Prompts for Adult AI Photos That Actually Work
Most adult AI photos look flat and generic because the prompt never specifies where the camera is standing. This article covers 5 exact camera angle prompts for adult AI photos, with copy-paste structures, model recommendations, and real examples generated on PicassoIA. From low-angle power shots to intimate close-ups, each angle produces a completely different result.
The difference between an adult AI photo that looks like stock art and one that stops you mid-scroll is almost never the model, the lighting keywords, or even the subject. It is the camera angle. Most people write prompts that describe what to show but never tell the AI where the camera is standing. That one missing variable collapses a scene from three dimensions into a flat, generic image.
This article breaks down 5 specific camera angle prompts, with exact copy-paste language, real images generated on PicassoIA, and a clear breakdown of which models handle each angle best. Whether you shoot low-angle glamour, overhead editorial, or tight close-ups, the prompts below work immediately.
Why Camera Angle Gets Skipped
Most prompt writers focus on the subject first: "a beautiful woman in a bikini on the beach." That description gives the AI everything it needs to generate a competent image. But "competent" means average. The AI defaults to a safe eye-level shot from about 6 feet away, natural horizon, nothing unexpected.
That is fine for reference images. For anything meant to be striking, you need to tell the AI exactly where to put the camera, how far above the ground it sits, what the lens focal length is, and what direction the light is coming from. These four variables transform an image more than the subject description ever will.
The Angle Tells the Story
Photography direction exists because angle communicates subtext without words. A low angle makes the subject feel dominant and powerful. An overhead shot makes the image abstract, almost architectural. A tight close-up creates intimacy that a full-body shot never achieves. An over-the-shoulder composition introduces narrative tension, suggesting motion and mystery.
AI models respond to this framing language the same way a human photographer interprets a creative brief. When your prompt specifies "shot from an extreme low angle, camera positioned just centimeters off the ground looking upward," the model has a spatial reference it can anchor the entire composition to. Without that reference, it guesses, and the guess is always the safe, boring default.
Distance Works With Angle
Angle and distance work together as a system. A low-angle close-up is completely different from a low-angle wide shot. A bird's eye view at 24mm produces a dramatically different spatial feeling than the same overhead angle at 85mm. Specifying the focal length gives the AI a second data point that shapes compression, background blur, and perceived intimacy.
Tip: Always pair your angle with a specific lens. "85mm f/1.8" produces a very different result than "24mm f/2.8" even from the exact same camera position. The wide lens exaggerates and distorts; the portrait lens compresses and flatters.
The 5 Camera Angles That Work
Each angle below comes with a ready-to-use prompt structure, a generated example image, and notes on what makes it effective.
1. Low Angle (The Power Shot)
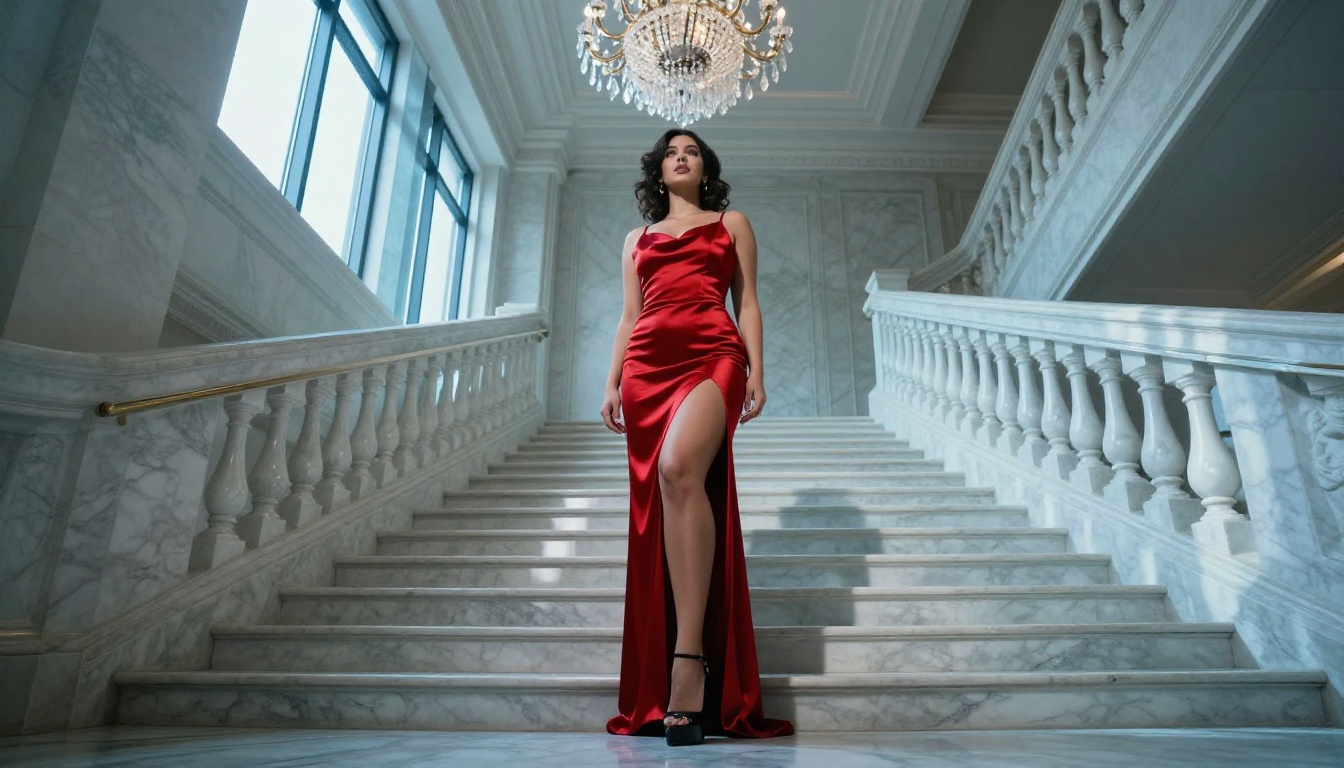
The camera sits below the subject looking upward. Legs dominate the foreground, the sky or ceiling fills the background, and the subject appears larger than life. This angle borrowed from film cinematography produces some of the most visually arresting results in AI glamour photography.
What it communicates: Confidence, authority, visual dominance. Ideal for full-body beach, rooftop, staircase, or architectural settings where environmental scale supports the upward view.
Prompt structure:
[subject + outfit + location], photographed from an extreme low angle,
camera positioned just [distance] off the ground looking upward,
[subject's] legs dominate the lower foreground, [background element]
fills the upper frame. Shot on [camera] with a [lens], [lighting
description], Kodak Portra 400 film grain, 8K photorealistic
--ar 16:9 --style raw
Example prompt used for this image:
A confident, curvaceous woman in a red satin slip dress at the base of a grand marble staircase, photographed from an extreme low angle just centimeters off the polished floor looking upward. Her legs dominate the lower foreground. Crystal chandelier glitters above. Sony A7R V, 24mm f/2.8, natural window light from upper left, Kodak Portra 400, 8K photorealistic --ar 16:9 --style raw
The 24mm wide-angle exaggerates the perspective distortion here, making the staircase stretch dramatically behind her. A tighter 85mm lens from the same position would compress the scene and feel more natural but lose the architectural drama entirely.
Pro variation: Add "wet reflective floor surface, mirroring subject's silhouette below" to introduce a second compositional plane and dramatically increase visual complexity.
2. Bird's Eye View (The Overhead Look)
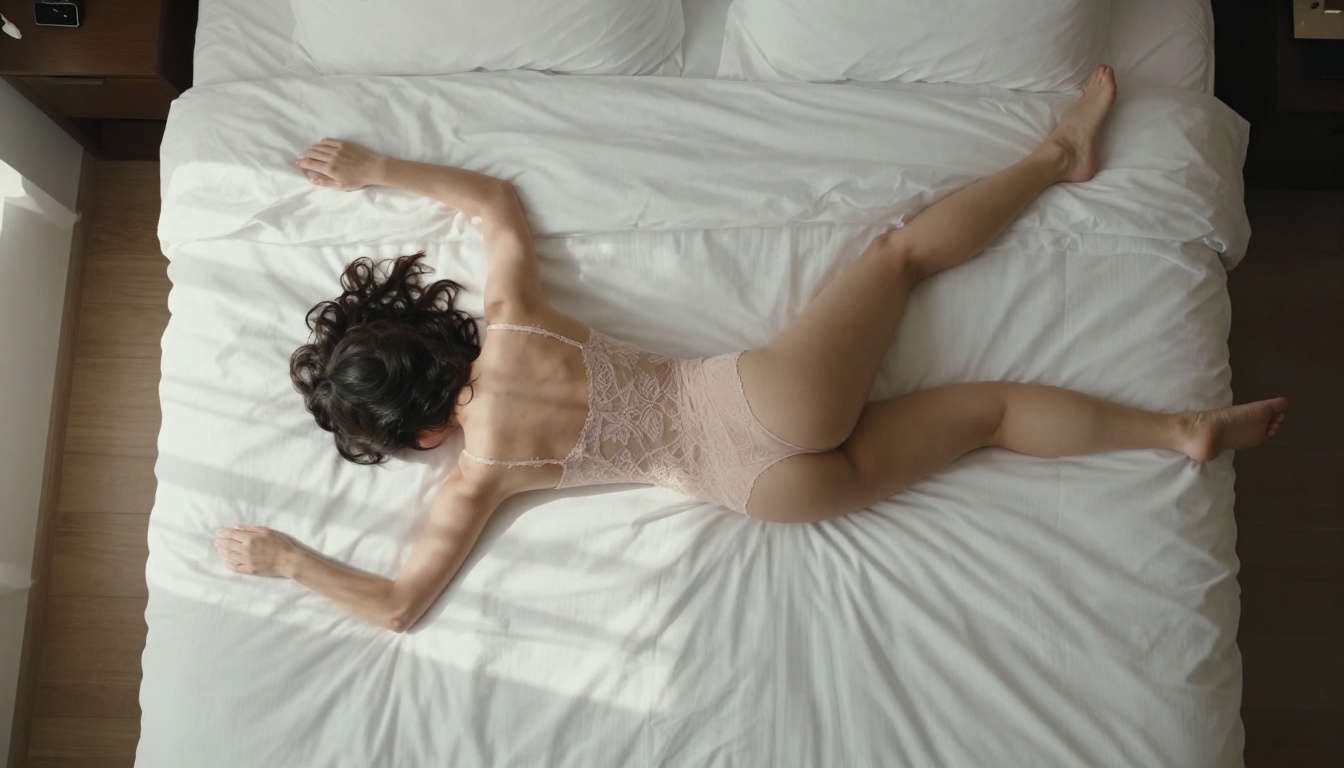
The camera is positioned directly above the subject, pointing straight down at 90 degrees. The composition becomes flat and graphic, turning the scene into an almost abstract arrangement of shapes, textures, and negative space.
What it communicates: Vulnerability, artistic detachment, graphic elegance. Works best for subjects on beds, floors, sand, or water where the surface itself becomes a compositional element.
Prompt structure:
Directly overhead bird's eye view looking straight down at [subject
description], lying on [surface], wearing [outfit]. [Hair/body position
detail]. [Lighting source] from [direction]. Shot on [camera], tethered
from a ceiling-mount rig, extreme overhead 90-degree downward angle,
[film emulation], 8K photorealistic --ar 16:9 --style raw
Example prompt used for this image:
Directly overhead bird's eye view looking straight down at a beautiful woman lying on crisp white Egyptian cotton sheets, her dark hair fanned out in a perfect halo, wearing a blush-pink lace bodysuit. Morning light from tall windows to the left. Leica Q3, 28mm f/1.7, ceiling-mount rig, Kodak Gold 200 emulation, 8K photorealistic --ar 16:9 --style raw
Important: Specify the hair arrangement explicitly in overhead shots. AI models default to a compressed, awkward head shape when no hair position direction is given for downward angles. "Hair fanned out in a perfect halo" is the most reliable instruction to get this right.
Pro variation: Replace the bed with sand, water, or a geometric floor tile pattern to shift the mood from intimate to graphic editorial.
3. Extreme Close-Up (The Detail Focus)
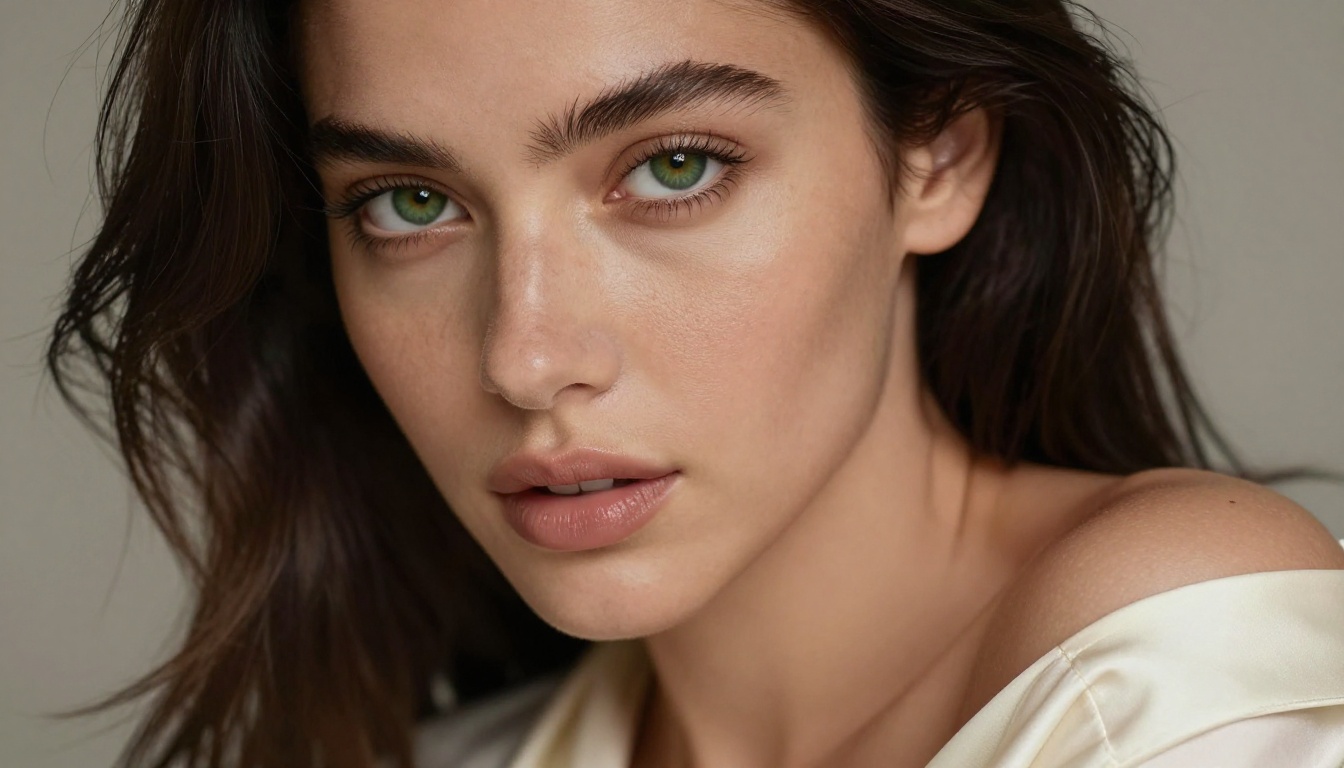
The camera frames from collarbone to just above the brow, filling the entire frame with face and neck. Background disappears into shallow bokeh. Every skin texture detail becomes visible, from individual lashes to the fine grain of lip texture.
What it communicates: Intimacy, detail, emotional intensity. Most effective for beauty-focused or editorial content where skin, expression, and light interaction are the primary subject.
Prompt structure:
Extreme close-up portrait framing from [start point] to [end point],
[specific facial feature] in sharp focus with [other side] in gentle bokeh.
[Subject's features described]. Shot on [camera] with [macro/portrait
lens], [studio or natural lighting setup], [film emulation], 8K
hyper-detailed studio beauty photography --ar 16:9 --style raw
Example prompt used for this image:
Extreme close-up portrait framing from collarbone to just above the brow, full lips slightly parted, deep green eyes in sharp focus on the right side, left side of face in gentle bokeh. Off-shoulder cream silk blouse. Nikon Z9, 105mm f/2.8 macro, diffused softbox from 45-degree upper-right, Rembrandt triangle on left cheek, 8K studio beauty photography --ar 16:9 --style raw
Specifying which eye is in sharp focus changes the result dramatically. Without that instruction, the AI will often create an uncomfortable split-focus that reads as error rather than intention. The out-of-focus eye should be slightly turned away, creating natural depth in the frame.
Pro variation: Add "water droplets on collarbone and shoulder catching the light" for a summer editorial version that adds texture and visual interest to the lower frame.
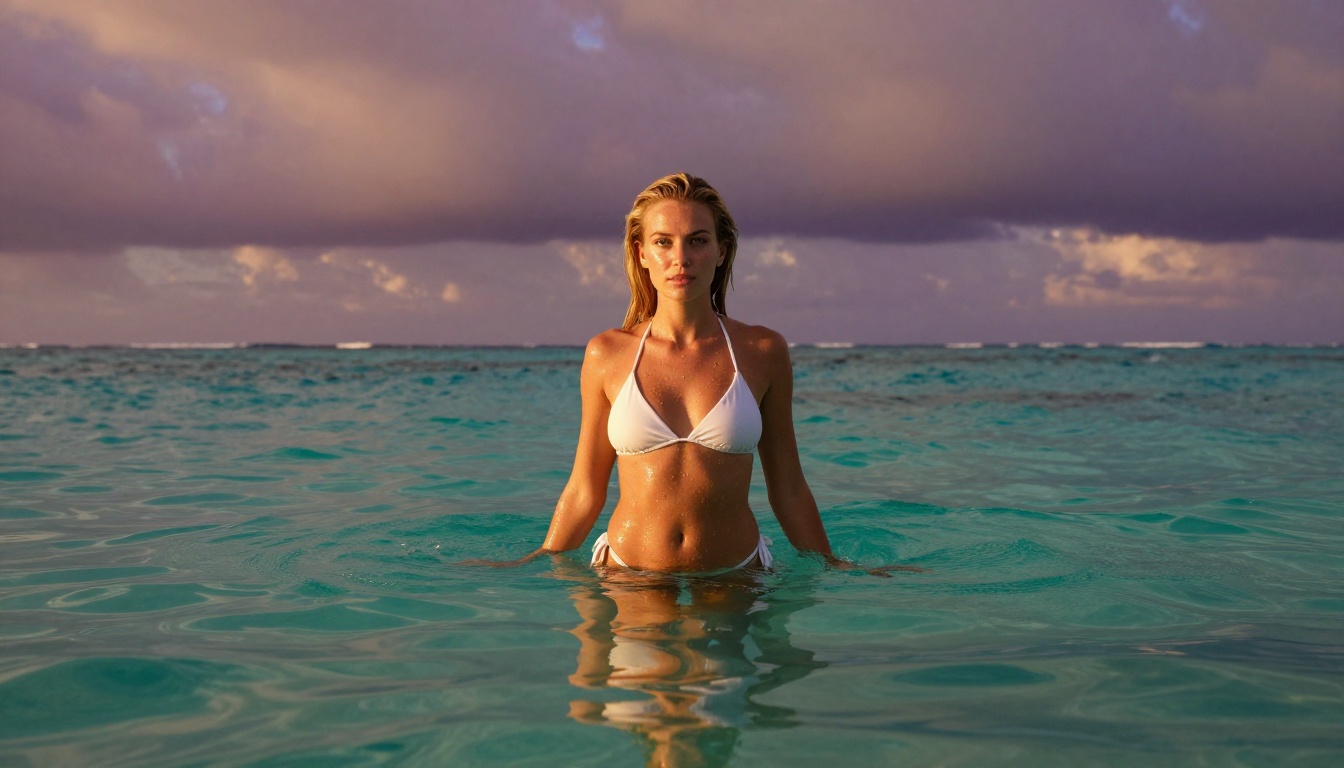
4. Eye Level (The Intimate Direct)
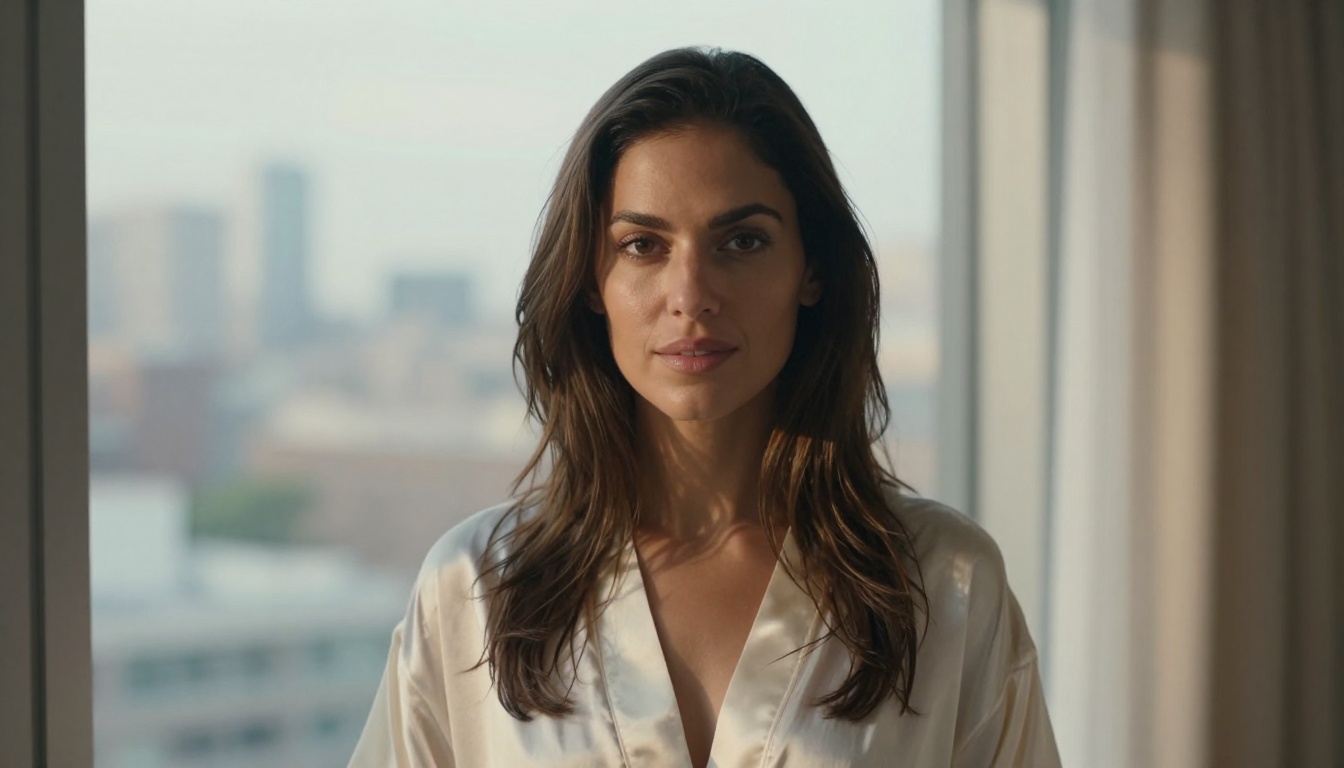
The camera is exactly parallel to the subject's eyes, at their height, looking straight ahead. This is the most natural angle, placing the viewer in the position of someone standing directly in front of the subject. The power comes from the gaze: direct, unmediated, intimate.
What it communicates: Presence, directness, emotional connection. The subject looks into the camera as if looking at you personally, creating an intensity that wider shots cannot replicate.
Prompt structure:
A woman [description and outfit] photographed at perfect eye-level,
camera positioned exactly at [her eye height], the lens parallel to
the horizon. [Gaze direction]. [Background environment] in shallow depth
of field at f/[aperture]. [Lighting description]. Shot on [camera],
[focal length] f/[aperture], [film emulation], 8K photorealistic
glamour editorial --ar 16:9 --style raw
Example prompt used for this image:
A woman with natural brunette hair standing at eye-level against a floor-to-ceiling window in a modern penthouse, wearing a sheer ivory silk robe. Camera positioned exactly at her eye height, lens parallel to the horizon. Gaze meets camera directly, confident and warm. Overcast daylight from behind supplemented by warm lamp glow from the right. Canon R6 Mark II, 85mm f/1.8, Fuji Pro 400H emulation, 8K glamour editorial --ar 16:9 --style raw
This is the one angle where backlighting works particularly well without an explicit fill instruction, because the subject's face receives reflected light from the floor and surrounding surfaces naturally. The backlit sheer fabric effect seen in the example above requires no complex lighting description: just "backlit by floor-to-ceiling windows" and a sheer or lightweight fabric description.
Pro variation: Shoot at golden hour. Replace "overcast daylight from behind" with "direct golden hour sunlight from behind, creating a warm halo rim light around hair and shoulders."
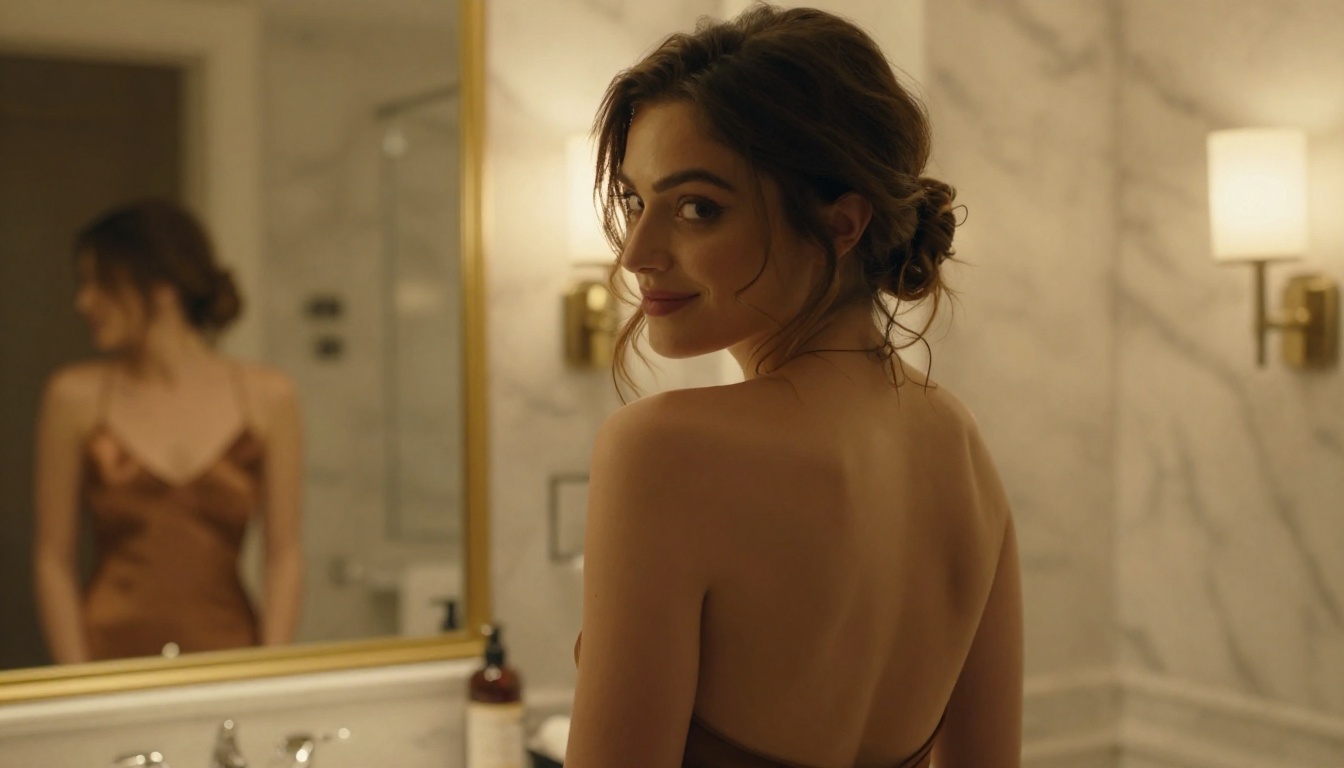
5. Over-the-Shoulder (The Tease)
The camera sits behind and slightly to one side of the subject, who looks back over their shoulder at the lens. The composition reveals the subject's back, one shoulder, and a partial three-quarter face looking back at the viewer.
What it communicates: Intrigue, invitation, narrative tension. The composition implies motion, as if you have caught the subject mid-departure. The revealed spine and shoulder line creates an elegant, suggestive visual that works across a wide range of editorial and glamour styles.
Prompt structure:
Over-the-shoulder shot of [subject description] looking back over
their [left/right] shoulder toward the camera with [expression].
[Outfit detail emphasizing back/shoulder]. Camera positioned behind
and slightly to their [right/left], drawing the eye along [neck/back/
spine] toward their face. [Background in soft focus]. Shot on [camera],
[lens], [lighting setup], [film emulation], 8K resolution, intimate
editorial glamour --ar 16:9 --style raw
Example prompt used for this image:
Over-the-shoulder shot of a woman looking back over her left shoulder with a playful, knowing smile. Low-back silk slip dress reveals the curve of her spine, hair in a loose updo with soft wisps framing her neck. Camera behind and slightly to her right, drawing the eye along her neck and back toward her smiling face. Marble bathroom background in soft focus. Sony A7III, 50mm f/1.4, tungsten bathroom lighting from front, Kodak Portra 400, 8K intimate editorial glamour --ar 16:9 --style raw
Specifying which shoulder the subject looks over changes the entire composition. Left shoulder equals a right-facing gaze. Right shoulder equals a left-facing gaze. Choose based on where you want the viewer's eye to exit the frame, and what environmental detail you want visible in the background over their other shoulder.
Pro variation: Swap the indoor setting for a doorway opening onto a bright exterior. The contrast between the indoor shadow and the bright background behind the subject creates a natural chiaroscuro effect.
3 Modifiers That Sharpen Any Angle
Beyond the 5 angles above, three specific prompt modifiers improve output consistently across all of them.
Lens Focal Length
The focal length changes the relationship between subject and background more than any other single variable. Always specify it.
Focal Length
Effect
Best For
24mm wide
Exaggerates perspective, dramatic distortion
Low angle, architectural
35mm moderate wide
Slight distortion, environmental context
Wide environmental shots
50mm standard
Natural human perspective, no distortion
Eye level, over-the-shoulder
85mm portrait
Slight compression, soft background separation
Close-up, three-quarter
105mm macro
Maximum compression, extreme bokeh
Extreme close-up, beauty
Lighting Direction
Always specify where the light is coming from. "Morning light from the left" is enough. The AI responds better to directional descriptions than to complex technical lighting setups.
"Volumetric morning light from left" = natural and warm, shadows to the right
"Diffused softbox from 45-degree upper-right" = studio beauty, soft shadow on left
"Practical streetlight from directly above" = dramatic urban, downward shadows
"Backlit by floor-to-ceiling windows" = silhouette and rim light effect
"Candlelight warm fill from the right, cool ambient from above" = intimate interior
Film Stock Emulation
Adding a film stock reference shifts the AI's color grading and grain structure in a way that no other single word achieves. These four are the most reliable:
Kodak Portra 400: warm skin tones, fine grain, versatile for all skin types and environments
Fuji Pro 400H: cooler shadows, clean highlights, ideal for daylight and window-lit interiors
Kodak Gold 200: warm, slightly saturated, nostalgic atmosphere, excellent for beach and outdoor
Seedream 4.5 is the top recommendation for adult AI photos on PicassoIA. It accepts NSFW prompts, generates in under 3 seconds, and handles camera angle instructions with more spatial accuracy than most models available today.
Step 2: Set aspect ratio to 16:9 for landscape or editorial output, 9:16 for vertical portrait-style shots. The angle prompts above were written for 16:9 but work across both ratios.
Step 3: Paste your angle prompt. For best results with Seedream 4.5, front-load the angle description before the subject description:
"Extreme low angle looking upward, camera just above the floor..." then add subject, outfit, environment, lighting, and lens.
Step 4: Add "--style raw" at the end and set generation steps to at least 30 for maximum skin texture detail and realistic fabric rendering.
Step 5: If the first result misses the angle, add "camera perspective: [angle name]" as a separate sentence in the prompt. Seedream 4.5 responds well to this structural override when the initial composition interpretation is off.
For unlimited generations: PicassoIA Image Editor Pro lets Elite and Infinite subscribers run as many images as they want at no extra cost. Need 500 iterations to get an angle exactly right? That is 500 images free, vs. roughly $50 on most per-generation models. Results arrive in under 1 second. A free trial of 3 generations is available with no credit card required.
Best Models for Adult AI Photos on PicassoIA
PicassoIA hosts several models that accept adult content and handle realistic glamour photography prompts well. Here is the full ranked list, from the best all-around option to specialized alternatives:
If you are using Seedream 4.5 for all angles (a reasonable approach given its versatility), weight your prompt language more heavily on the angle description for bird's eye and overhead shots, where it occasionally needs more explicit spatial instruction than for ground-level perspectives.
4 Mistakes That Break the Angle
1. No spatial description in the prompt
Writing "low angle shot" is far less effective than "camera positioned 10 centimeters off the ground looking upward." Spatial, physical language produces dramatically better results than photographic jargon alone. Tell the AI where the camera physically is in the space, not what the shot is called.
2. Conflicting angle instructions
"Bird's eye view with eye-level direct gaze" is contradictory. A subject seen from directly above cannot look directly into a camera that is level with their eyes. Pick one spatial reference and commit to it throughout the entire prompt description.
3. Missing lens specification
Without a lens call, the AI defaults to a standard 50mm equivalent. For dramatic distortion at low angles, specify 24mm or 28mm. For compressed portrait close-ups, specify 85mm or 105mm. The lens specification does more compositional work in the prompt than almost any other technical parameter.
4. No lighting direction
Even a simple "morning light from the left" tells the AI where shadows fall and how the light wraps around the subject's form. Without it, lighting becomes inconsistent with the stated angle, particularly in close-up shots where the shadow direction should precisely match a believable source position.
Try These Prompts Right Now
Every image in this article was generated using the exact prompts above on PicassoIA. The platform puts the best NSFW-capable AI models in one place, no local installs, no content restrictions, and no per-image friction on the Elite plan.
Start with the low-angle prompt: copy it, swap the outfit and location details, and run it on Seedream 4.5. Then try PicassoIA Image Editor Pro to iterate on the result at no extra cost. For overhead shots, Qwen Image 2 handles the spatial composition particularly well.
The 5 angles here are a foundation, not a ceiling. Mix them: a bird's eye close-up, a low-angle over-the-shoulder, an eye-level wide shot. Each combination opens a different visual register and produces results that look nothing like generic AI output. Pair them with film stock emulation and directional lighting, and the difference from a basic prompt becomes immediately visible.
Browse the full lineup of NSFW-capable models and start generating without limits at picassoia.com/en/all-models.