Large Language ModelsGenerate imagesGenerate videos
Nano Banana MCP in Cursor and Codex: Setup and Examples
A hands-on walkthrough for connecting Nano Banana image generation to Cursor and Codex through MCP. It includes the exact mcp.json and config.toml files, secret handling, a side by side comparison, copy-ready prompts, and fixes for the errors that block setup.
Typing a prompt into a chat tab, downloading a PNG, and dragging it into your repo is a slow loop when the code already lives in Cursor or Codex. An MCP server removes the detour: the coding agent calls Nano Banana itself, saves the file where your project can use it, and keeps editing the same image across turns. This article wires Nano Banana MCP in Cursor and Codex from an empty config to a working image call, with the exact files, the prompts that behave well, and the errors that show up on day one. The Cursor and Codex settings follow their current documentation, and the server details come from the package's public README. Where a detail depends on the server you pick, the text says so.
What the Server Actually Does
MCP (Model Context Protocol) is a standard way for an AI client to call outside tools. An image server exposes a handful of them, such as generate_image or edit_image, and the model inside Cursor or Codex decides when to call one based on what you ask in chat. Nano Banana is the nickname of Google's Gemini image model, available as Nano Banana on PicassoIA, with Nano Banana Pro as the higher resolution tier. The MCP server itself is a small Node process on your machine. It holds your Gemini token, forwards the prompt to Google, and writes the result to disk.
Here is what a typical Nano Banana server gives your agent:
Text to image: describe a scene, get a PNG back.
Edit by file path: point at an existing image and describe the change.
Continue editing: refine the last image without repeating the whole prompt.
Status tools: report whether the token is configured before you waste a call.
Why bother running it inside the editor? Because the same chat that writes your hero component can also produce the hero image, name the file, and update the <img> tag. The prompt lives in your chat history next to the commit, and iteration costs one sentence instead of a browser round trip.
💡 The server runs locally and spends your Gemini quota. Neither Cursor nor Codex bills you for the image calls.
Requirements and Trust Check
Five minutes of preparation prevents most of the failures described later in this article.
The Checklist
Item
Why you need it
Where to get it
Node.js 18 or newer
npx launches the server
nodejs.org
Gemini API token
Authenticates every image call
Google AI Studio
Cursor or Codex CLI
The MCP client that talks to the server
Your editor or terminal install
A writable folder
The server saves generated PNG files there
Any project directory
Run node --version first. If it prints anything below 18, upgrade before touching a config file, because a too-old runtime fails with errors that look unrelated.
Pick a Server You Trust
Several npm packages claim the Nano Banana name. nano-banana-mcp documents six tools: generate_image, edit_image, continue_editing, get_last_image_info, configure_gemini_token and get_configuration_status. @saroby/nanobanana-mcp lists only two, generate_image and list_images. @mindstone/mcp-server-nano-banana is a third option. Tool names differ between them, so prompts written for one will not always match another.
An npx server runs code on your computer with your user permissions, and it sees the token you give it. Read the repository, check the date of the last release, and pin an exact version once everything works. This walkthrough uses nano-banana-mcp because its tool list is documented in public.
Set Up Nano Banana MCP in Cursor
Cursor reads MCP servers from two places: .cursor/mcp.json inside a project, and ~/.cursor/mcp.json in your home folder for servers you want everywhere. When both define the same server name, the project file wins.
Save the file. Cursor picks it up without a full reinstall.
Open the Customize panel in the sidebar and find nano-banana in the MCP list.
Switch the toggle on. Disabled servers do not load and do not appear in chat.
Ask the agent: "Check the Nano Banana configuration status." A green server and a clear status reply mean the wiring works.
By default Cursor asks for approval before each MCP tool runs. Click the arrow next to the tool name to inspect the arguments, which is worth doing for the first few calls so you see exactly what prompt the agent wrote.
💡 On Windows, if the server fails to spawn, replace the command with cmd and the arguments with ["/c", "npx", "-y", "nano-banana-mcp"]. Some setups cannot launch npx directly.
Keep Secrets Out of Git
The ${env:GEMINI_API_KEY} syntax tells Cursor to read the value from your environment when it starts the server, so the file itself holds no secret and is safe to commit. Cursor resolves several variables this way: ${env:NAME}, ${userHome} and ${workspaceFolder} are the ones you will use most.
Set the variable once where Cursor can see it:
macOS and Linux: export it in your shell profile, then start Cursor from a fresh terminal. An app launched from the dock can miss variables defined only in a shell file.
Windows: add it as a user environment variable, then quit and reopen Cursor.
Set Up Nano Banana MCP in Codex
Codex stores everything in one TOML file, ~/.codex/config.toml, and gives you a command to edit it so you rarely open the file at all.
Everything after the double dash is the command that starts the server. Confirm the entry with codex mcp list, then start a Codex session and type /mcp to see active servers and their status. The other subcommands are login for OAuth servers and remove to delete an entry.
The catch: this form writes your token into config.toml as plain text. For a personal laptop that may be fine. For anything shared, use the next method.
Edit config.toml by Hand
The same server, with the token inherited from your shell instead of stored:
env_vars lists variable names Codex copies from the parent process, so the token never touches the file.
startup_timeout_sec matters on the first launch, when npx downloads the package before the server can answer. If the first run times out, raise it.
tool_timeout_sec limits one tool call. Image generation takes longer than most tools, so give it room.
Cursor and Codex Side by Side
Cursor
Codex
Config file
.cursor/mcp.json or ~/.cursor/mcp.json
~/.codex/config.toml
Format
JSON with an mcpServers object
TOML with [mcp_servers.name] tables
Add a server
Edit the file or use the Customize panel
codex mcp add
Secret handling
${env:NAME} interpolation
env_vars inherits from the shell
Check status
Toggle and tool list in Customize
/mcp inside a session
Timeouts
Not set in the file
startup_timeout_sec, tool_timeout_sec
The practical difference is sharing. A project level .cursor/mcp.json can be committed, so a whole team gets the same server definition and only needs their own token. Codex keeps its list in your home folder, which suits a personal setup but needs a short README line if teammates should copy it.
Prompts Worth Copying
A working server is only half the job. The prompt decides whether you get a usable asset or a coin flip. Three habits help in both clients: name the file you want, ask for one image per call, and describe the photograph rather than the mood.
Weak prompt
Better prompt
Why it works
"Make a cool hero image"
"16:9 hero for a pricing page, a laptop on an oak desk, morning window light, shallow depth of field, no text"
States format, subject, light and a constraint
"A shoe"
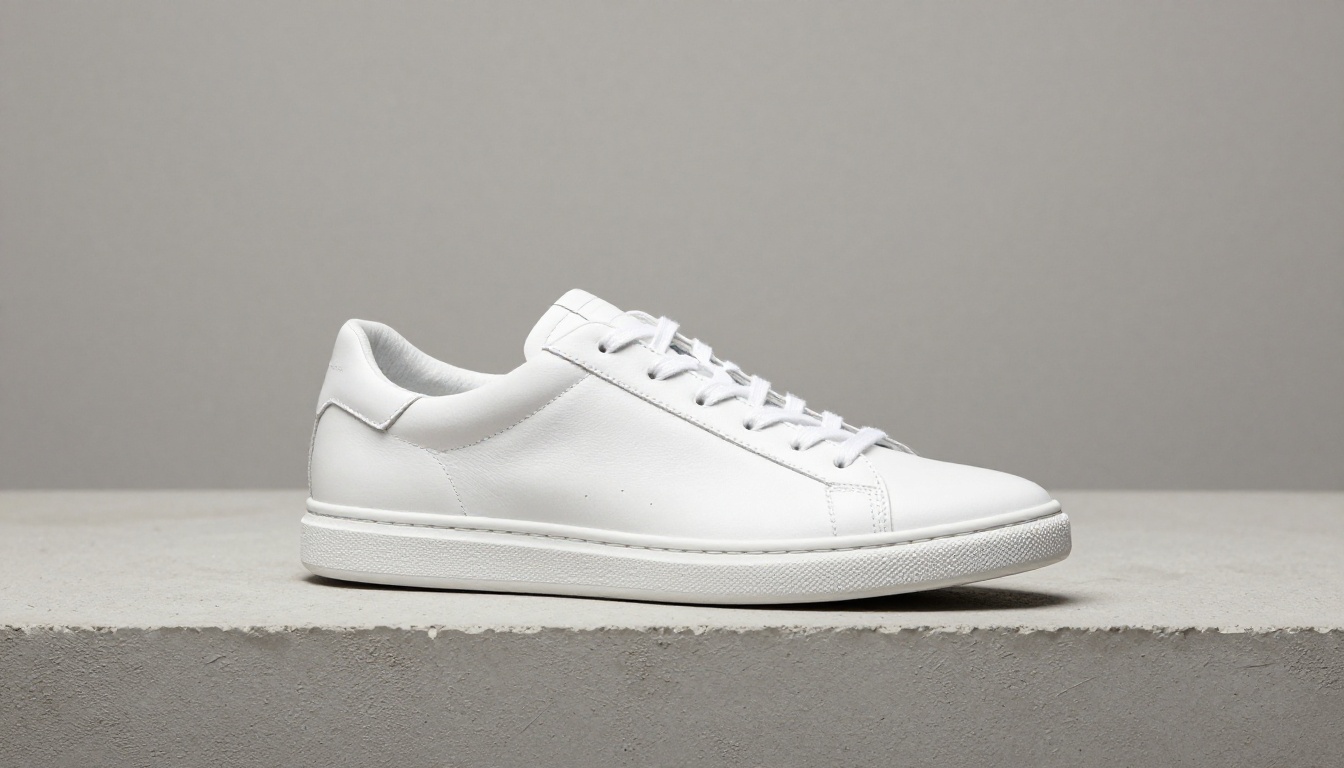
"White leather sneaker on pale concrete, softbox light from the left, seamless grey backdrop"
Gives the model a camera setup
"Fix the picture"
"Edit public/images/shoe.png: warmer backdrop, keep stitching and logo unchanged"
Points at a file and lists what must not change
Hero Image for a Landing Page
Paste this into the chat:
Use the Nano Banana generate_image tool to create a 16:9 hero image for the pricing page: a slim laptop on a worn oak desk in warm morning light from a window on the left, a ceramic mug in the foreground, shallow depth of field, no text, no logos. Then move the file into public/images/ as pricing-hero.png and update the image tag in Hero.tsx.
Most servers save into their own default folder, such as nano-banana-images in your Documents folder on Windows or generated_imgs in the working directory on macOS and Linux. That is why the prompt asks the agent to move the file. Agents handle the move with a normal terminal command.
Product Shots and Edits
Generate a base image first, then edit it in place:
Generate a studio photo of a white leather sneaker on a pale concrete block against a seamless grey backdrop, softbox light from the upper left. Save it as shoe.png.
Follow up with a targeted change:
Use edit_image on shoe.png: switch the backdrop to warm sand, keep the stitching, laces and sole exactly as they are.
If your server has a continue_editing tool, small adjustments become a single sentence: "Make the shadow softer." Some servers also accept several reference images in one call, which helps when you need a consistent style across a set of product photos. Check your server's README before relying on it.
Prompts Written by the Model
You do not have to write every prompt yourself. Ask the agent to read a page and propose three image prompts that match its copy, then approve one. The model driving Cursor or Codex does this well because it can see the surrounding component, the brand colours in your stylesheet and the aspect ratio of the slot.
If you want a second opinion outside the editor, PicassoIA hosts language models you can use for the same job, including Claude Sonnet 5 and GPT 5.6 Sol. Paste your page copy, ask for prompts in the weak versus better format above, and bring the winner back to the agent.
Fixing Common Errors
Most failures fall into three groups: the server never starts, the token is missing, or the files end up somewhere unexpected.
Server Never Starts
Symptom
Likely cause
Fix
Red status in Cursor, nothing in the tool list
npx not found by the app
Use the full path to npx, or the cmd /c form on Windows
Codex shows a startup timeout
First launch is downloading the package
Raise startup_timeout_sec, run the npx command once manually
Immediate exit
Node.js older than 18
Upgrade Node and restart the client
Tools missing after a config edit
Client still has the old config
Toggle the server off and on, or restart the session
Run the exact command from your config in a plain terminal. If it prints an error there, the problem is the server or your environment, not Cursor or Codex.
Token and Quota Errors
An authentication error almost always means the variable is missing from the process that launches the server, even though it exists in your shell. Print it in the same terminal you start the client from. If you use a status tool such as get_configuration_status, call it first and read the reply before blaming the model.
Quota or rate limit replies come from Google, not from MCP. Slow down, ask for one image at a time, and check your usage in Google AI Studio. Retrying in a tight loop only makes the throttle last longer.
Run Nano Banana on PicassoIA
Not every image needs a local server. When you want to test a prompt quickly, share a result, or avoid managing a token, the browser route is faster.
Open the model page and type your prompt. Use the same photographic wording you would give the MCP agent.
Choose the aspect ratio that matches your slot. 16:9 suits hero banners, 1:1 suits product grids.
Generate, review, and refine the prompt rather than regenerating blindly. Change one thing at a time.
Download the result and drop it into your project, or keep it as a reference for the agent.
Two sibling models are worth trying when the first result is close but not right. Nano Banana 2 is the newer generation, and Nano Banana 2 Lite trades some quality for speed, which suits drafts. Nano Banana Pro is the choice for final assets that need more resolution.
Turn Stills Into Video
A still from your editor workflow can become a short clip. Take the hero image, open an image to video model, and describe the motion: a slow push in, steam rising from a mug, light drifting across a wall. Seedance 2.0 generates video with built-in audio, Seedance 2.5 Lite produces clips up to 10 seconds, and Veo 3.1 is another option when you want Google's video model next to Google's image model.
Call PicassoIA From Code
PicassoIA also has a developer API and an MCP connector. The API lives at https://api.picassoia.com/v1 and uses a Bearer token that starts with pia_sk_. It follows a Replicate style flow: create a prediction with POST /v1/models/{owner}/{name}/predictions, poll GET /v1/predictions/{id}, then read the result. Limits include 5 concurrent predictions per account and 4,000 characters per prompt.
One honest caveat: the models exposed through the API and MCP connector are picassoia/picassoia-image, picassoia/picassoia-image-editor-pro, picassoia/picassoia-video and picassoia/seedance-2.5-lite. Nano Banana is not in that short list, so use the browser page for it. You can still link the PicassoIA Image Editor Pro and PicassoIA Image pages to see what each one does. API access depends on your plan, and the wording on the pricing and API pages differs, so confirm your plan before building on it.
Try It on Your Own Project
You now have the full loop: a server that starts, a token that stays out of git, prompts that name files and cameras, and fixes for the failures that stop most people at step one. Pick one real slot in your current project, a hero banner or a product tile, and run the Cursor or Codex setup above today.
If you want to see what the model does before touching a config file, open it on Picasso IA, paste one of the prompts from this article, and compare the result with what your agent produces. Try Nano Banana first, then branch out to the other image and video models at picassoia.com/en/all-models. Experiment with the lighting, the lens and the aspect ratio, and keep the prompts that work in a file next to your code.